A supermoon is one of the most striking sights in the night sky—and one of the most deceptively tricky subjects to photograph. If you’ve ever pointed your camera or phone at a giant glowing moon and ended up with a tiny white dot or a blown-out blob, you’re not alone. The good news: with a few simple techniques, you can reliably capture sharp, detailed, dramatic supermoon photos, even as a beginner.
This guide walks you step-by-step through planning, gear, camera settings, composition, and editing so you can nail your next supermoon shot with confidence.
What Is a Supermoon (and Why It’s Hard to Photograph)?
A supermoon happens when a full moon coincides with the moon being at or near its closest point to Earth in its orbit (perigee). That makes it appear larger and brighter than an average full moon—up to about 14% bigger and 30% brighter, depending on the orbit (source: NASA).
Why it’s tricky to photograph:
- The moon is extremely bright against a dark sky.
- Your camera wants to “average” the scene, which overexposes the moon.
- Auto focus and auto exposure often fail in low light.
- The moon is moving constantly (and so is the Earth).
Understanding these challenges makes it easier to beat them with the right approach.
Plan the Perfect Supermoon Shoot
Great supermoon photos start before you even leave home. Planning helps you know where the moon will rise, when it will be brightest, and what you can frame it with.
1. Know the Supermoon Dates and Times
Check reliable astronomy calendars so you don’t miss the event. Good tools:
- Timeanddate.com – lunar phases and supermoon listings
- Apps like Photopills, The Photographer’s Ephemeris (TPE), or Stellarium
Look up:
- Exact date and time of moonrise and moonset
- Direction (azimuth) where the moon will rise
- Weather forecast and cloud cover
2. Choose a Location in Advance
The most compelling supermoon photos usually include something besides just the moon: city skylines, mountains, trees, bridges, or people. Scout locations where you can:
- See the horizon clearly in the direction of moonrise.
- Safely set up a tripod and stay for an hour or two.
- Include a meaningful foreground or silhouette.
Pro tip: The supermoon looks biggest near the horizon, thanks to the “moon illusion.” Plan to shoot during moonrise or moonset when it appears extra dramatic.
Best Gear for Supermoon Photography (From Phone to Pro)
You don’t need a professional kit to capture the supermoon, but the right tools will improve your results.
Using a Smartphone
You can get surprisingly good supermoon shots with a modern smartphone if you:
- Use a tripod (or solid support) to avoid blur.
- Turn on Night Mode or Pro/Manual mode.
- Use the telephoto lens if your phone has one.
- Use a 2–3 second self-timer to avoid shake.
Using a DSLR or Mirrorless Camera
For more control and detail:
- Camera: Any DSLR or mirrorless with manual controls.
- Lens:
- 200–300mm or longer is ideal for close-up moon shots.
- 50–135mm for wide scenes with landscape and moon together.
- Tripod: A sturdy tripod is essential for sharp images.
- Remote shutter or 2-sec timer: Reduces camera shake.
- Optional:
- Teleconverter to increase focal length.
- Star tracker (not necessary for the moon, but useful if you also shoot the Milky Way later).
Supermoon Camera Settings That Actually Work
The moon is sunlit rock, not a dim star. Treat it more like shooting a daylight subject than a night scene.
Start with the “Looney 11” Rule
A classic starting point for exposed moon details:
- Aperture: f/11
- Shutter speed: 1 / ISO (e.g., ISO 100 → 1/100 sec; ISO 200 → 1/200 sec)
- ISO: 100–200
From there, adjust:
- If the moon is too bright: increase shutter speed or stop down aperture (e.g., f/13).
- If too dark: slow your shutter slightly or raise ISO.
Step-by-Step Settings for Sharp Supermoon Shots
- Mode: Manual (M) or Shutter Priority (S/Tv).
- Focus:
- Switch to manual focus.
- Use live view and zoom in on the moon, then focus until craters look crisp.
- Aperture: f/8–f/11 for sharpness.
- ISO: 100–400 for clean images.
- Shutter Speed: Around 1/60–1/250 sec. The moon moves, so avoid very long exposures.
- White Balance: Daylight or Auto; adjust later if needed.
- Stabilization:
- Turn off lens stabilization if the camera is on a tripod.
- Use a timer or remote to avoid touching the camera.
For smartphones, use Pro or Manual mode (if available) to:
- Lower ISO to minimize noise.
- Shorten shutter speed to avoid motion blur.
- Tap to focus on the moon and drag exposure down until details appear.
Composition Secrets: Make the Supermoon Look Huge and Dramatic
A detailed moon is nice; a powerful supermoon image tells a story. Composition is where that happens.
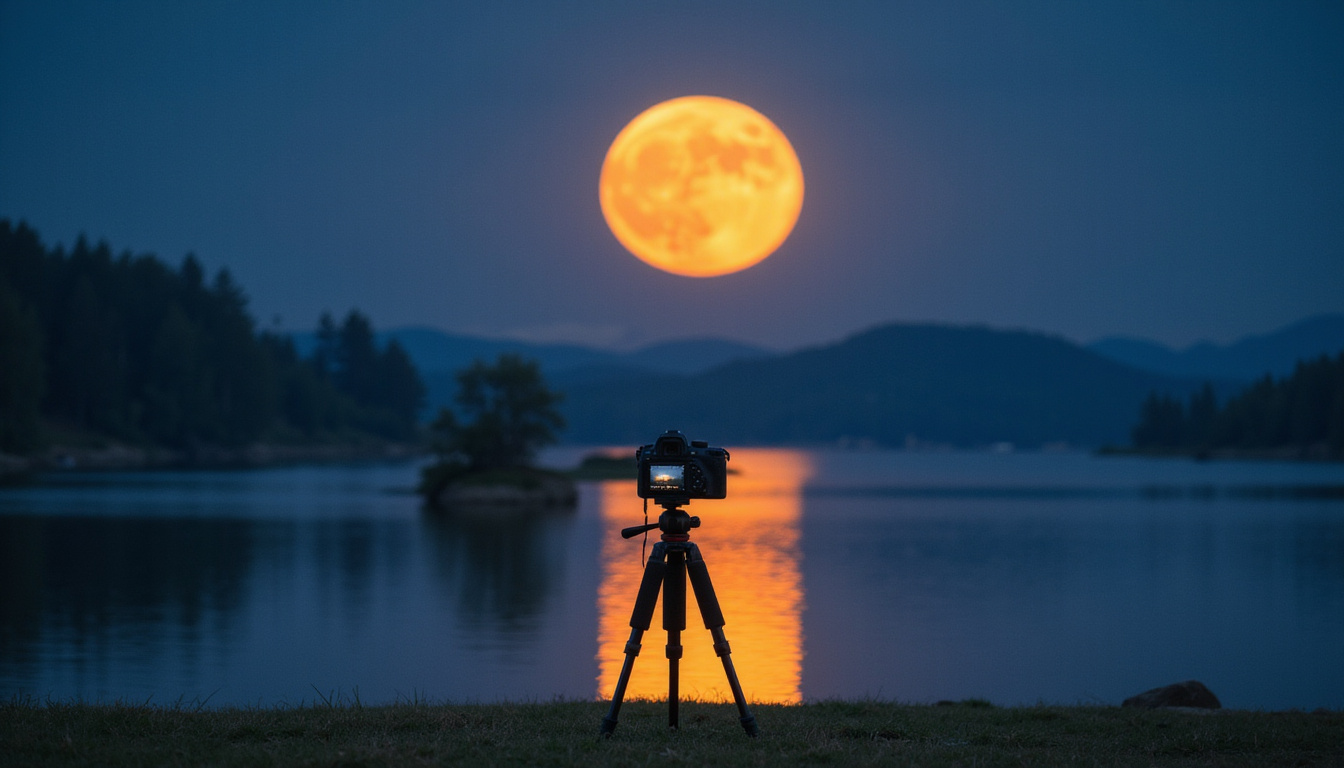
Use Foreground Elements
Include objects that give scale and context:
- City skyline, towers, or churches
- Mountains, cliffs, or trees
- Lighthouses, bridges, or piers
- People on a hilltop or rooftop
Stand far away from your chosen subject and use a long lens. This compresses perspective, making the supermoon look massive behind the foreground.
Plan Your Alignment
Use apps like Photopills or TPE to line up the moon with:
- Landmarks (e.g., the moon rising next to a famous building)
- A church steeple or tower
- A person standing on a ridge
This takes practice, but when it works, the result looks like magic.
Try Different Framing Styles
- Close-up: Fill the frame with the moon to show craters and texture.
- Wide environmental: Moon + landscape/cityscape to tell a larger story.
- Silhouette: Place a dark subject (tree, person, building) against the bright moon.
- Reflection: Shoot over water and capture the moon’s reflection on a lake or sea.
Avoid These Common Supermoon Photo Mistakes
Most disappointing moon photos come from a few predictable errors. Watch out for these:
- Overexposed moon: Looks like a featureless white disc. Lower your exposure until you see craters and texture.
- Tiny moon: Using a wide lens from too close to your foreground subject. Step back far and use a longer focal length.
- Blurred images: Caused by camera shake or too slow a shutter. Use a tripod and faster shutter speed.
- Out-of-focus moon: Auto-focus hunts in low light. Use manual focus with live view zoom.
- No detail due to haze: Moisture or pollution can soften the moon. Shoot when the air is clear, or wait until it’s a bit higher in the sky.
Simple Editing Steps to Enhance Your Supermoon Images
Even well-exposed supermoon shots benefit from light editing. You don’t need complex software; smartphone editing apps, Lightroom, or similar tools will do.
Focus on subtle, realistic enhancements:
-
Crop and straighten
- Crop to improve composition and make the moon more prominent.
-
Adjust exposure and contrast
- Slightly darken highlights to preserve lunar details.
- Add a bit of contrast to make the craters pop.
-
Boost clarity and sharpness
- Increase clarity/texture moderately for crisp detail.
- Apply sharpening, but avoid a crunchy, over-processed look.
-
Reduce noise
- Apply just enough noise reduction to smooth the sky, not smear detail.
-
Tweak color
- Correct white balance if the moon looks too blue or orange.
- For a “blood moon” or warm supermoon feel, a gentle warm tint can look natural.
Remember: realism usually looks more impressive than heavy filters.
Quick Supermoon Shooting Checklist
Use this before you head out:
- [ ] Checked supermoon date, moonrise time, and direction.
- [ ] Scouted a safe location with a good view and foreground.
- [ ] Charged camera/phone batteries and cleared memory card.
- [ ] Packed tripod and (optional) remote shutter.
- [ ] Set camera to manual mode and pre-tested “Looney 11” settings.
- [ ] Installed or opened planning apps (Photopills, TPE, etc.).
- [ ] Brought warm clothes and a flashlight/headlamp for safety.
FAQ: Supermoon Photography Basics
1. What settings should I use to photograph a super moon?
For a detailed super moon photo, start with:
- Mode: Manual
- Aperture: f/8–f/11
- ISO: 100–200
- Shutter: 1/60–1/250 sec
Then review your shot: if the moon is too bright, increase shutter speed; if too dark, slow the shutter or raise ISO slightly.
2. Can I capture a supermoon with my phone and still get good results?
Yes, supermoon photography with a smartphone is very possible:
- Use Night or Pro mode.
- Stabilize the phone with a tripod or solid support.
- Tap on the moon and pull exposure down until detail appears.
- Use the telephoto lens instead of digital zoom whenever possible.
You won’t match a long-lens camera’s detail, but you can still get striking, shareable images.
3. How do I make the supermoon look bigger in my photos?
To make the supermoon photos look dramatic:
- Use a long focal length (200mm+ on a camera, or phone telephoto).
- Stand far away from your foreground subject and zoom in.
- Line up the moon near the horizon with buildings, mountains, or people to emphasize scale.
This “compression” effect makes the moon appear huge compared to objects in the foreground.
Ready to Capture Your Next Supermoon?
The next time a supermoon rises, you won’t be stuck with a tiny white dot in a black sky. With a bit of planning, a stable setup, the right exposure, and thoughtful composition, you can create images that truly reflect the awe you feel when you see that giant glowing disc hover over your world.
Don’t wait until the night of the event to practice—head outside on the next clear full moon and rehearse these techniques. Experiment with different locations, focal lengths, and foregrounds so that when the next supermoon arrives, you’re ready to capture it at its best. Grab your camera or phone, mark your calendar, and start planning your shot now—the sky’s putting on a show, and you’ve got the skills to photograph it beautifully.
Learn how astronomy, psychology, and spiritual traditions intersect by visiting SpiritualMindScience.com for deeper insights.